
从 Markdown 到 GitHub Pages:一套更简洁的发布流程
这套流程解决什么
目标很具体:平时只写 Markdown,运行一条命令,网站自动生成并发布到 GitHub Pages。域名、HTTPS 和后续内容更新都不需要每次重新配置。
这套方案适合愿意维护少量代码、希望文章仍然掌握在自己文件里的人。如果你完全不想接触终端,可以在最后了解本地内容输入工具,但底层流程仍然是下面这些步骤。
What this workflow solves
The goal is concrete: write Markdown, run one command, and publish the generated site to GitHub Pages. The domain, HTTPS and routine content updates should not require a new setup every time.
This approach is for people who are comfortable maintaining a small amount of code and want to keep their writing in local files. A content input tool can reduce the command-line work later, but the publishing pipeline remains the same.
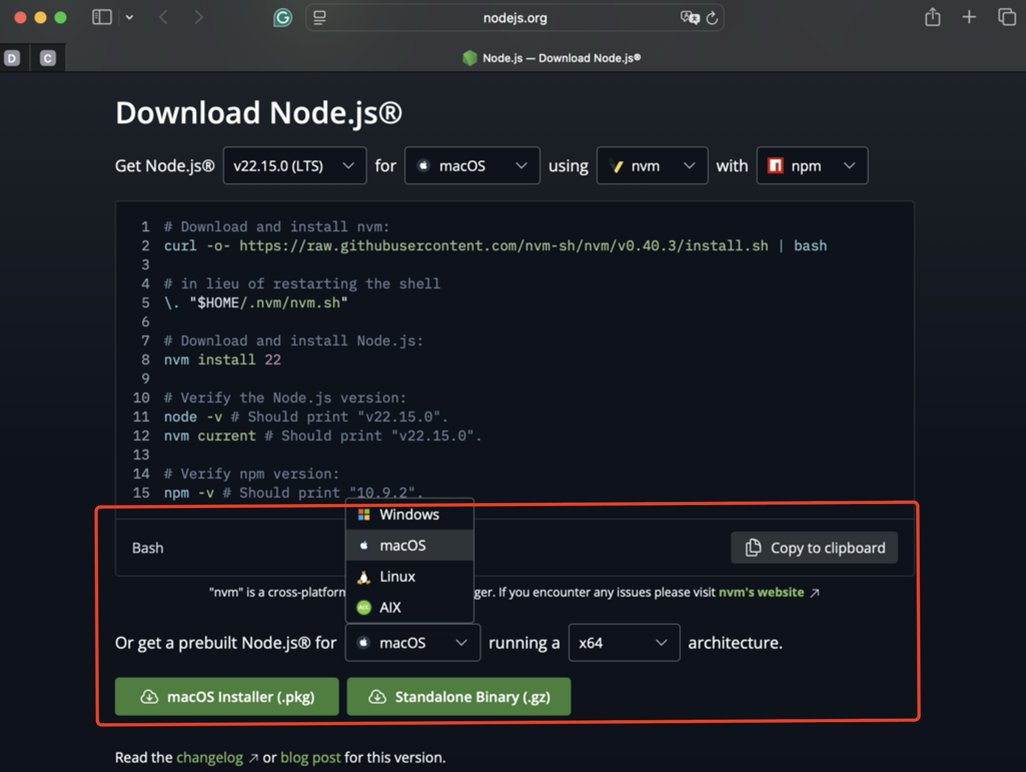
1. 准备环境
需要三个工具:Node.js 负责运行 Hexo,npm 负责安装依赖,Git 负责版本管理和部署。先检查版本:
node -v |
如果 Git 在 macOS 上因为 Xcode 许可卡住,可以显式使用 Command Line Tools:
/Library/Developer/CommandLineTools/usr/bin/git --version |
然后安装 Hexo CLI:
npm install -g hexo-cli |
1. Prepare the environment
Three tools are enough: Node.js runs Hexo, npm installs dependencies, and Git handles version control and deployment. Check them first:
node -v |
On macOS, if Git is blocked by an Xcode licence prompt, call the Command Line Tools binary directly:
/Library/Developer/CommandLineTools/usr/bin/git --version |
Then install the Hexo CLI:
npm install -g hexo-cli |
2. 初始化并预览网站
hexo init blog |
默认地址是 http://localhost:4000。确认页面能打开后,再修改主题、菜单和页面内容。常用命令如下:
npm run clean |
不要同时运行多个本地服务器实例。端口被占用时,明确指定一个新端口:
npx hexo server --port 4001 |
2. Create and preview the site
hexo init blog |
The default address is http://localhost:4000. Once it opens correctly, update the theme, navigation and page content. The main commands are:
npm run clean |
Do not run multiple local servers at once. If the port is occupied, choose another one:
npx hexo server --port 4001 |
3. 建立 GitHub Pages 仓库
对于用户主页,仓库名必须遵循:
<username>.github.io |
例如:Simon-zj1.github.io。创建仓库后,把 Hexo 的部署目标写入 _config.yml:
deploy: |
使用 SSH 地址比 HTTPS 更适合长期部署,但前提是这台电脑已经配置好 GitHub SSH Key。
3. Create the GitHub Pages repository
For a user site, the repository name must follow this pattern:
<username>.github.io |
For example: Simon-zj1.github.io. After creating the repository, point Hexo at it in _config.yml:
deploy: |
SSH is convenient for long-term deployment, provided the machine already has a GitHub SSH key.
4. 把发布变成一条命令
项目里可以使用一个简单脚本,先清理、生成,再部署:
#!/bin/zsh |
再把它加入 package.json:
{ |
之后每次更新只需要:
npm run deploy |
如果要进一步减少操作,可以再做一个本地内容输入界面,把自然语言整理成 Markdown,并在保存后调用同一个发布命令。重要的是:内容输入可以更方便,但最后仍然走同一条可重复的构建与部署流程。
4. Reduce publishing to one command
A small script can clean, build and deploy the site:
#!/bin/zsh |
Add it to package.json:
{ |
Every update then becomes:
npm run deploy |
If you want less command-line work later, add a local content interface that turns natural language into Markdown and calls the same deploy command after saving. The input can be easier, but the build and publish path remains reproducible.
5. 配置自定义域名
在仓库的 Settings > Pages 中填写域名,例如 www.example.com。DNS 通常需要两条记录:
www CNAME <username>.github.io |
然后在 Hexo 的 source/CNAME 中写入同一个域名:
www.example.com |
DNS 生效后,重新部署,并在 GitHub Pages 中等待证书签发。HTTPS 证书不是即时生成的,解析正确也不代表证书马上可用。
5. Connect a custom domain
Enter the domain in Settings > Pages, for example www.example.com. DNS normally needs two kinds of records:
www CNAME <username>.github.io |
Then place the same domain in source/CNAME:
www.example.com |
After DNS resolves, redeploy and wait for the certificate in GitHub Pages. HTTPS is not issued instantly, and correct DNS alone does not guarantee an immediate certificate.
常见问题速查
Quick troubleshooting
| 现象 | Symptom | 先检查什么 | Check first |
|---|---|---|---|
| 本地页面打不开 | Local site does not open | 端口是否占用、Hexo 是否仍在前台运行 | Port conflicts and whether Hexo is still running |
| 部署提示 SSH 错误 | Deploy fails with SSH error | 仓库地址、Deploy Key、Git 二进制路径 | Repository URL, deploy key and Git binary path |
| 域名能访问但证书异常 | Domain opens but HTTPS fails | DNS 记录、CNAME 文件、GitHub Pages 证书状态 | DNS records, CNAME file and certificate status |
| 浏览器仍显示旧图标 | Browser still shows an old icon | 固定标签页缓存,先取消固定再重新打开 | Pinned-tab cache; unpin the tab and open it again |
好的发布流程不是让技术变得更复杂,而是让你不再为重复操作分心,把精力留给内容本身。
A good publishing workflow does not add complexity. It removes repeated work so attention can return to the writing.